Several years before I retired, I took up scrapbooking. And closely aligned with scrapbooking is card making. You use a lot of the same supplies and techniques. I also followed card making on Pinterest and saved lots of examples, thinking I would benefit from them when I quit working. My plan was to make cards as a retiree.
I also started collecting various supplies and tools that I thought would be helpful with card making. I even took some classes at Archivers (I was SO sad when they closed) to learn different techniques and to be exposed to different tools.
Even before I retired, I made a few cards. I made card sets for a couple of my friends. They were the types of cards you always wish you had on hand like thank you and sympathy cards. (I think that’s what they were. It was so many years ago and I didn’t save any notes or pictures.)
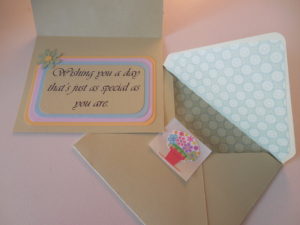
Card making is not that difficult. It takes the right supplies and a little imagination. And sometimes, inspiration from what others have done. So, I’m sharing one of my latest cards with you to see if I can inspire you too.
Supplies needed
One of the first things I do after I determine the design of my card is gather all the supplies I’ll need. Most of these supplies are available at Michael’s, but I’ve also bought on Amazon, at Hobby Lobby, and at JoAnn’s Fabrics.
The list can seem daunting, but most of these things I’ve accumulated over the years. If you’d like to try cardmaking but don’t want to invest in all of these things, start simpler until you decide if making cards is the right thing for you.
Here is a list of what I used to make this card.
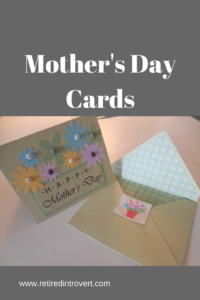
- 8.5 x 11 Cardstock. I used a light green for the base of the card and the envelope. One piece for the card and one for the envelope. I also used one piece of white for the message on both the inside and outside of the card.
- Cardstock scraps. These are used for the flowers and the matting. Choose colors that coordinate with your base color. (In this case, I actually started with the little buttons and decided my flower colors based on the buttons I had.) If you don’t have scraps, use full sheets of paper and then start your own scrap stash!!
- Punches or some other tool for cutting out the flower shapes. (I’ll tell you more about what I used for the flowers later in the post.) I also used a punch to round the corners on my messages.
- Buttons for the centers of the flowers. These can be any kinds of buttons but I like these tiny ones. You could even use paper dots instead of buttons. Just use a paper punch to create the dots.
- Coordinating print paper (or DSP – designer series paper) for the inside of the envelope. I have small pads that contain all these pretty papers. Or you could use a scrap saved from another project.
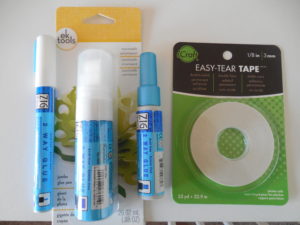
- Glue. I use ek tools ZIG Memory System glue sticks. They come in various sizes – thick, thin and very thin – and I love them. But any glue will work, even Elmer’s.
- Tear tape. I had never heard of this until recently, but it’s wonderful. I have it in three sizes – 1/8″, 1/4″ and 1/2″. Before I had this, I glued all my envelopes shut, which doesn’t work very well if you’re packaging cards as a gift. I even found a recipe for making envelope glue but abandoned that once I found this.
- Sticker maker. This is also something new in my tool chest. It makes 1.5″ stickers of anything you want. I’ve had a lot of fun with this. And you won’t believe how cheap this little tool is. It’s a good way to experiment and determine if it’s worth buying something better. (I think I’m ready for something better. 😉 )
- Envelope punch board. This is something I found before I retired and knew I’d want it. I love making envelopes that match my cards!!
- Paper cutter. There are various types you can use. Several years ago, I bought a large one that measures approximately 12×12 inches. You can cut things by hand, but it’s easier and you’ll have cleaner cuts with a cutter.
- Scoring tool. This isn’t critical but you’ll have crisper folds if you use one.
- Laptop/PC, software, and printer. This is if you want to design and print any part of your card on a computer like I did.
Creating the inside and outside messages
It’s always a challenge to find just the right thing to say. There are lots of ideas out there and believe me, I use them. I try to personalize them as much as I can for each person. Check my Pinterest board for the ideas I’ve accumulated.
You can use stamps for the messages, so you don’t have to come up with your own. I have several stamps and they do come in handy. (I like the clear kind that adheres to a clear block.)
But I’m not a great stamper (guess I need more practice or someone to train me?) and I want something that looks neater and cleaner than my stamping. So lately, I’ve been creating the messages on my laptop and printing them on cardstock.
There are so many wonderful fonts available, you can achieve any look you want. In a future post, I’ll share some of my favorites and how you can get them. So far, I’ve only chosen the free fonts, although there are some nice ones I’d like to purchase. I’ve also found a site where I can get my own handwriting made into a font. Doesn’t that sound like the coolest idea?
I’ve been using Microsoft Publisher to create my messages and to design with clipart. Did you know Microsoft no longer includes a clipart library in their Office suite? That’s a bummer; I have used it a lot in the past. However, I can still access online clipart through my Office products, by making sure I’ve checked the “include Bing content” box. And sometimes I go straight to the internet myself and search for the clipart I want. In this case, I found clipart that I used to create the sticker.
For this particular card, I chose two different fonts: “Happy” uses the Gadugi (28) font. “Mother’s Day” uses Vivaldi (48). I used Vivaldi for the inside of the card as well. To achieve the look I wanted, I spaced out the letters in H A P P Y and drew my own dots between the letters.
It’s important to make sure what you print is the right size for your card. I typically print first on regular paper to make sure it’s what I want. I can make adjustments at this point if it’s too large or too small for my card. I haven’t yet tried to print directly on the cardstock that’s the base for my card. I usually use some type of matting to make it stand out.
Cutting the flowers
To make the flowers, I used a Slice machine. These were on the market years ago and as with some of my other supplies and tools, I decided I would get value out of this someday, so I bought one. It uses SD cards to cut designs in different shapes and sizes (1-4 inches). I like it because it’s compact and portable. It even charges so I can use it without a power cord.
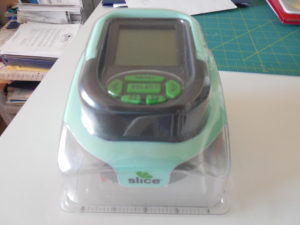
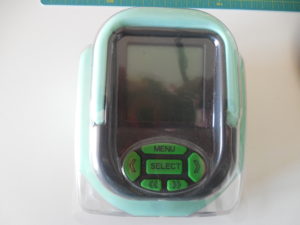
Unfortunately, I’m not sure it’s available anymore. You can still find some of the design cards. Some are reasonably priced while others are quite expensive. So far, I’ve stuck with the ones I have, which I also smartly purchased years ago.
However, there are other more popular die cutting options such as Sizzix or Cricut. These newer tools are more versatile and will handle both die cutting and dry embossing.
Assembling the pieces to make the card
Once I had printed the messages and the image for the sticker on white cardstock and cut out the flowers, I was ready to assemble.
- I chose to make this card 4″ x 5″. I like this size mostly because I could use one piece of cardstock for the card and one for the envelope. Any larger and I’d have to use 12″ x 12″ cardstock, which is possible but there’s more waste (or more scraps for later?) and not as many color choices. I cut out what I needed for the card and scored it so I could fold it in half.
- My envelope punch board tells me the size my paper needs to be to make an envelope for this size card. I cut this out from the other piece of cardstock. The punch board is then used to score and trim the paper to form the envelope.
- If you choose, you can add pretty paper to the inside of the envelope, either before or after you’ve glued it together. Simply trace the top part of the envelope on the back of the paper. Cut it out slightly smaller and then glue it to the envelope. Just make sure you’ve cut a piece that goes far enough into the envelope. I think it adds a nice touch.
- I cut out the messages and rounded off the corners. I then glued them to the paper I’d chosen for the mat. I did this twice more on the inside message as I wanted a triple mat so I could bring in all the colors from the front of the card.
- I glued the messages and flowers to the card and then added the buttons.
- The last thing with the card – I stamped the back with my “LA” stamp. (Sorry, I don’t have a picture of that. Maybe in a future post.) I have to have my branding on it somewhere, right?
- I cut out the flower image for the sticker and ran it through the sticker maker.
- I applied the tear tape to the envelope flap.
- When I was ready to use the card, I inserted it into the envelope, removed the tear tape (the glue will still be there), closed the envelope and added the sticker to the back.
- Give the card to your mother, mother-in-law or anyone else you’d like to wish a Happy Mother’s Day, like I did!!

Other types of cards
While this card was for Mother’s Day, the same design could be used for any type of card. Just change the messages to fit the occasion.
I’ve had lots of fun with this as I’ve made cards for the grandkids. Brady likes Batman and Carly is a Minnie Mouse girl. I’ve even found Batman and Disney fonts to use with their cards. They don’t really understand the concept of a homemade card but I think they like getting cards with their favorites on them.
I hope everyone enjoys getting one of my cards. Even if they don’t, I still get pleasure out of making them!! (That means they’ll continue getting them, whether they like them or not. 🙂 )
I sooo love your cards! I very much appreciate receiving them! #etsy
I’m SO glad!! I know, I know. I need to explore the Etsy thing further. But I also don’t want to commit to something I might not be able to keep up with!! (ha – as if the demand would be that high)